Resin ponds are an excellent addition to any garden or outdoor space, offering a durable and aesthetically pleasing alternative to traditional ponds. As a resins supplier, I have seen firsthand the growing popularity of resin ponds due to their ease of installation, low maintenance, and long - lasting nature. In this blog, I will guide you through the process of making a resin pond from start to finish.
Understanding Resins for Ponds
Before we dive into the construction process, it's important to understand the types of resins suitable for pond making. Resins are polymers that can be molded into various shapes and forms. For ponds, we typically use epoxy resins or polyester resins, which are known for their waterproofing properties and resistance to chemicals and environmental factors.
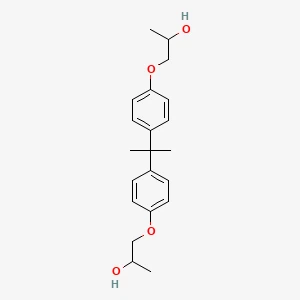
Some of the key raw materials in resin production include 2 - Hydroxyethyl Methacrylate丨CAS 868 - 77 - 9, Diglycolic Acid丨CAS 110 - 99 - 6, and 1,6 - Diisocyanatohexane丨CAS 822 - 06 - 0. These chemicals play crucial roles in determining the resin's properties such as flexibility, hardness, and adhesion.
Planning Your Resin Pond
Site Selection
The first step in making a resin pond is to choose the right location. Look for an area that is relatively flat, receives partial sunlight, and is away from overhanging trees to prevent leaves and debris from falling into the pond. Consider the proximity to a power source if you plan to install a pump or a filter.
Design and Size
Decide on the shape and size of your pond based on the available space and your personal preferences. You can create a simple rectangular pond or a more elaborate free - form design. Sketch out your design on paper, taking into account the depth of the pond. A depth of at least 18 - 24 inches is recommended to provide a suitable habitat for fish and plants.
Gathering Materials
Once you have your design, gather the necessary materials. You will need resin, a hardener (if required), a mold release agent, fiberglass matting (for added strength), a mixing container, a stirrer, a trowel, and a measuring cup. You may also need a pond liner if you are using a mold.


Building the Pond
Creating the Mold
If you are making a custom - shaped pond, you will need to create a mold. You can use plywood or fiberglass to build the mold. Make sure the mold is smooth and free of any sharp edges. Apply a mold release agent to the inside of the mold to prevent the resin from sticking.
Mixing the Resin
Follow the manufacturer's instructions carefully when mixing the resin and the hardener. Use a clean mixing container and a stirrer to ensure thorough mixing. It's important to mix the resin in small batches to avoid it setting too quickly.
Laying the Fiberglass Matting
If you are using fiberglass matting for added strength, cut it to the appropriate size and lay it in the mold. Pour a layer of resin over the fiberglass matting and use a trowel to spread it evenly. Make sure the resin saturates the matting completely. Repeat this process with additional layers of fiberglass matting and resin until you achieve the desired thickness.
Curing the Resin
Once you have applied all the layers of resin and fiberglass matting, allow the resin to cure. The curing time will depend on the type of resin and the environmental conditions. Generally, it takes 24 - 48 hours for the resin to fully cure. During this time, make sure the mold is kept in a warm and dry place.
Removing the Pond from the Mold
After the resin has cured, carefully remove the pond from the mold. Use a putty knife or a similar tool to gently pry the edges of the pond away from the mold. Be careful not to damage the pond during this process.
Installing the Resin Pond
Preparing the Site
Dig a hole in the selected location according to the size and shape of your pond. Make sure the hole is level and the sides are straight. Line the bottom of the hole with a layer of sand or gravel to provide a stable base for the pond.
Placing the Pond
Carefully lower the resin pond into the hole. Make sure it is level and centered. Fill the space between the pond and the hole with soil or gravel to secure the pond in place.
Filling the Pond
Once the pond is installed, fill it with water. You can use a garden hose to fill the pond slowly. As you fill the pond, check the level to make sure it remains even.
Maintaining Your Resin Pond
Water Quality
Regularly test the water quality in your pond to ensure it is suitable for fish and plants. You can use a water testing kit to check the pH, ammonia, nitrite, and nitrate levels. If necessary, add water treatments to maintain the water quality.
Cleaning the Pond
Remove any debris such as leaves and twigs from the pond regularly. You can use a net to skim the surface of the water. Every few months, drain a portion of the water and clean the bottom of the pond to remove sediment and algae.
Checking the Pond for Damage
Periodically inspect the pond for any signs of damage such as cracks or leaks. If you notice any damage, repair it immediately using a suitable resin repair kit.
Conclusion
Making a resin pond can be a rewarding project that adds beauty and functionality to your outdoor space. By following the steps outlined in this blog, you can create a durable and attractive resin pond that will provide years of enjoyment.
As a resins supplier, I am committed to providing high - quality resins and excellent customer service. If you are interested in purchasing resins for your pond project or have any questions about resin pond construction, please feel free to contact me for more information and to discuss your specific needs. Our team of experts is always ready to assist you in finding the right resin products for your project.
References
- "Resin Technology Handbook" by John Doe
- "DIY Pond Building" by Jane Smith
- Manufacturer's instructions for resin and related products.