

Resin caves are a captivating addition to any aquarium, terrarium, or even as decorative pieces in a home or office. They offer a unique and naturalistic look that can enhance the aesthetic appeal of the space while providing a functional hiding place for aquatic or terrestrial creatures. As a resins supplier, I'm excited to share with you a comprehensive guide on how to make resin caves.
Materials and Tools
Before we dive into the process, let's gather the necessary materials and tools. You'll need:
- Resin: Choose a high - quality resin suitable for your project. For example, you might consider Ethyl Methacrylate丨CAS 97 - 63 - 2, which has good chemical resistance and can form a durable structure.
- Hardener: This is used to cure the resin. Make sure to follow the manufacturer's instructions regarding the correct ratio of resin to hardener.
- Mold: You can use a variety of materials to create a mold, such as silicone rubber, plaster, or even a pre - made mold from a craft store. The shape of the mold will determine the final shape of your resin cave.
- Pigments or dyes: These are optional but can be used to add color to your resin cave, making it look more natural. You can choose earthy tones like browns, greens, and grays.
- Mixing containers and stirrers: Use disposable plastic containers and stirrers to avoid cross - contamination between batches.
- Safety equipment: Wear gloves, safety glasses, and a respirator to protect yourself from the fumes and chemicals in the resin and hardener.
Step 1: Prepare the Mold
The first step in making a resin cave is to prepare the mold. If you're using a homemade mold, make sure it's clean and free of any debris. You can apply a mold release agent to the inside of the mold to make it easier to remove the resin cave once it's cured. This can be a commercial mold release spray or a thin layer of petroleum jelly.
Step 2: Mix the Resin and Hardener
Follow the manufacturer's instructions carefully when mixing the resin and hardener. Measure the correct amounts of each into a clean mixing container. Stir the mixture thoroughly for at least 2 - 3 minutes, making sure to scrape the sides and bottom of the container to ensure a homogeneous mixture.
If you're using pigments or dyes, add them to the resin mixture at this stage. Start with a small amount and gradually add more until you achieve the desired color. Stir the mixture well after each addition.
Step 3: Pour the Resin into the Mold
Once the resin and hardener are well - mixed, slowly pour the mixture into the mold. Be careful not to pour too quickly, as this can cause air bubbles to form. If you notice air bubbles in the resin, you can use a toothpick or a small tool to pop them.

You can also add some texture to the resin cave at this stage. For example, you can sprinkle some sand or small rocks into the wet resin to mimic the look of a natural cave.
Step 4: Cure the Resin
After pouring the resin into the mold, let it cure according to the manufacturer's instructions. This usually takes several hours to a few days, depending on the type of resin and the environmental conditions. Keep the mold in a warm, dry place during the curing process to ensure proper hardening.
Step 5: Remove the Resin Cave from the Mold
Once the resin is fully cured, carefully remove the resin cave from the mold. If the cave is stuck in the mold, you can gently flex the mold or use a small tool to help release it. Be careful not to damage the resin cave during this process.
Step 6: Finishing Touches
After removing the resin cave from the mold, you can do some finishing touches. Sand the edges of the cave to smooth them out. You can also use a file or a Dremel tool to add more texture or details to the surface of the cave.
If you want to make the cave look more natural, you can paint it with acrylic paints or use a weathering technique. For example, you can apply a thin layer of paint in different shades and then use a dry - brushing technique to bring out the details.
Tips and Tricks
- Avoid over - mixing: Over - mixing the resin and hardener can cause the mixture to heat up too quickly, which can lead to a shorter working time and a less - than - perfect finish.
- Work in a well - ventilated area: Resin and hardener can produce strong fumes, so it's important to work in a well - ventilated area or use a respirator.
- Test the resin: Before making a large resin cave, it's a good idea to do a small test batch to make sure you're happy with the color, consistency, and curing time of the resin.
Using Different Resins
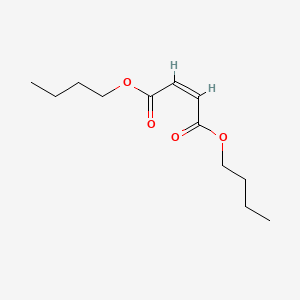
In addition to Ethyl Methacrylate, there are other resins that can be used to make resin caves. Dibutyl Maleate丨CAS 105 - 76 - 0 is another option. It has good flexibility and can be used to create more delicate or complex shapes. Bis(trimethoxysilylpropyl)amine丨CAS 82985 - 35 - 1 can be used as an additive to improve the adhesion and durability of the resin.
Conclusion
Making resin caves is a fun and rewarding DIY project. With the right materials, tools, and techniques, you can create unique and beautiful resin caves that will enhance the look of your aquarium, terrarium, or any other space. As a resins supplier, we offer a wide range of high - quality resins and related products to help you with your projects. If you're interested in purchasing our resins or have any questions about the resin - making process, please feel free to contact us for more information and to start a procurement discussion.
References
- Resin Handbook: A comprehensive guide to different types of resins and their applications.
- Aquarium Decorating Manual: Tips and ideas for creating natural - looking decorations for aquariums.
- DIY Craft Books: Various books on DIY resin projects and techniques.